Flight planning guide
Plan a building flight.
Step by step.
Learn how to plan a drone flight for a building: place the scan point, generate a path, and inspect the camera view before preparing a mission.
Try Flight Planner ↗Follow along in the browser. Check aircraft compatibility before planning an export.
The actual workflow
Plan a building scan, step by step.
Start with a small, familiar site. The map helps you compose a route; it does not establish obstacle clearance or permission to fly.
-
01 / LOCATE
Find the building
Use “Search address or place” to find the site. Select your aircraft profile and choose “3D Scan”. Click the building to place the scan point.
Check that the point is centred on the building you intend to photograph. The imagery may be older than the site.
-
02 / DEFINE
Set the building dimensions
Enter “Building size — radius (m)” and “Building height (m)”. A radius describes distance from the centre, not the full width. Confirm these values against the real site.
Choose the scan detail and review the estimated waypoint count before generating. More points alone do not guarantee a better model.
-
03 / GENERATE
Draw the flight path
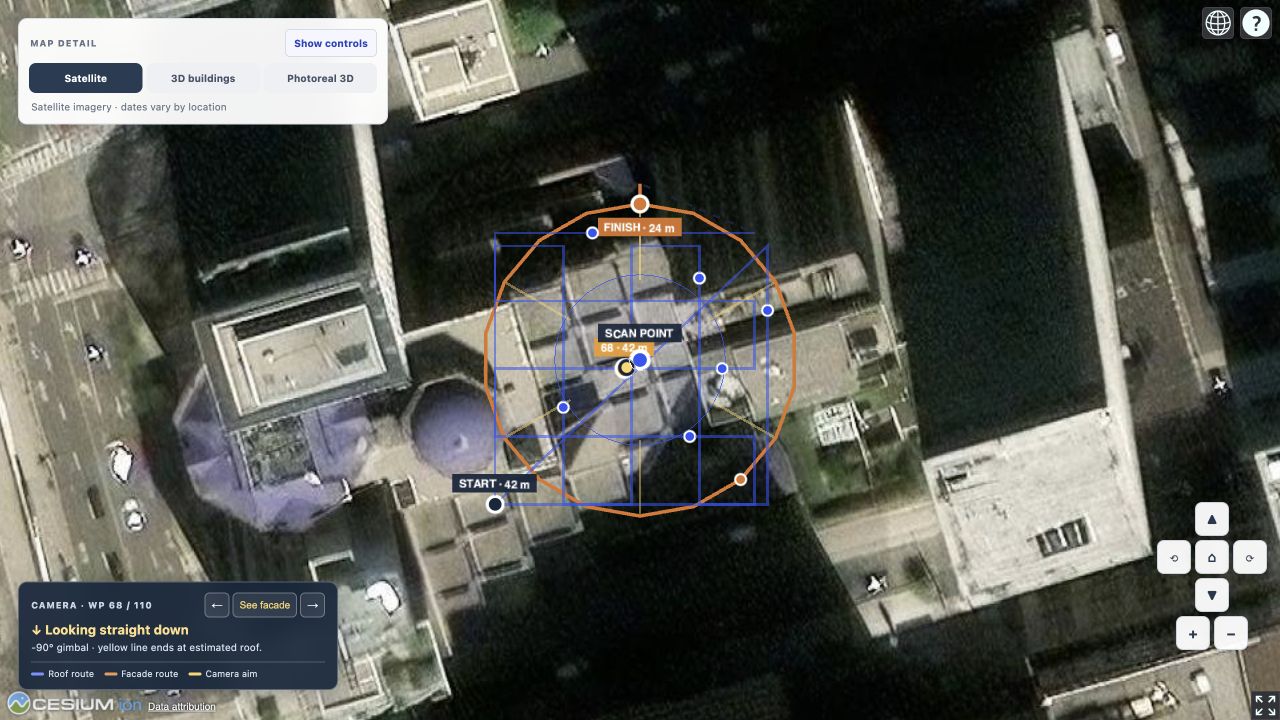
Select “Generate 3D flight path”. Examine the route around the building and over its roof. Check the point count and flight estimate, then adjust the settings if the route is too dense or extends beyond your intended area.
For an area instead of a building, use “2D Survey”. “Orbit” circles a subject; “Manual” lets you place individual waypoints.
-
04 / INSPECT
See where the camera looks
Select a waypoint to inspect its camera direction. Move around the map to review the roof and facade coverage, rather than judging only from the line of the route.
A route preview cannot confirm that trees, wires or a neighbouring building are clear of the aircraft.
-
05 / REFINE
Change settings together
Open “Apply to all waypoints”. Enter altitude, speed or gimbal pitch and choose “Apply to every point”. Leave a field blank to keep its existing values.
Applying one altitude or gimbal angle replaces the variation in a scan. Review the entire route again after a bulk edit.
-
06 / REVIEW
Check and name the mission
Use “Review route risks”, inspect the warnings, and enter a “KMZ download name”. For an export-enabled aircraft, use “Check & prepare KMZ”.
Review the file in the flight app and verify the site before flight. Planning previews for other aircraft do not imply compatible KMZ export or tested controller support.
From route to photographs
Plan for coverage, then check the capture.
Drone mapping flight planning begins with the views you need. For a building model, connected photographs of the roof and facades matter as much as the route itself. Crown’s previews are planning aids, not survey-grade results or a collision-avoidance system.
Put it into practice