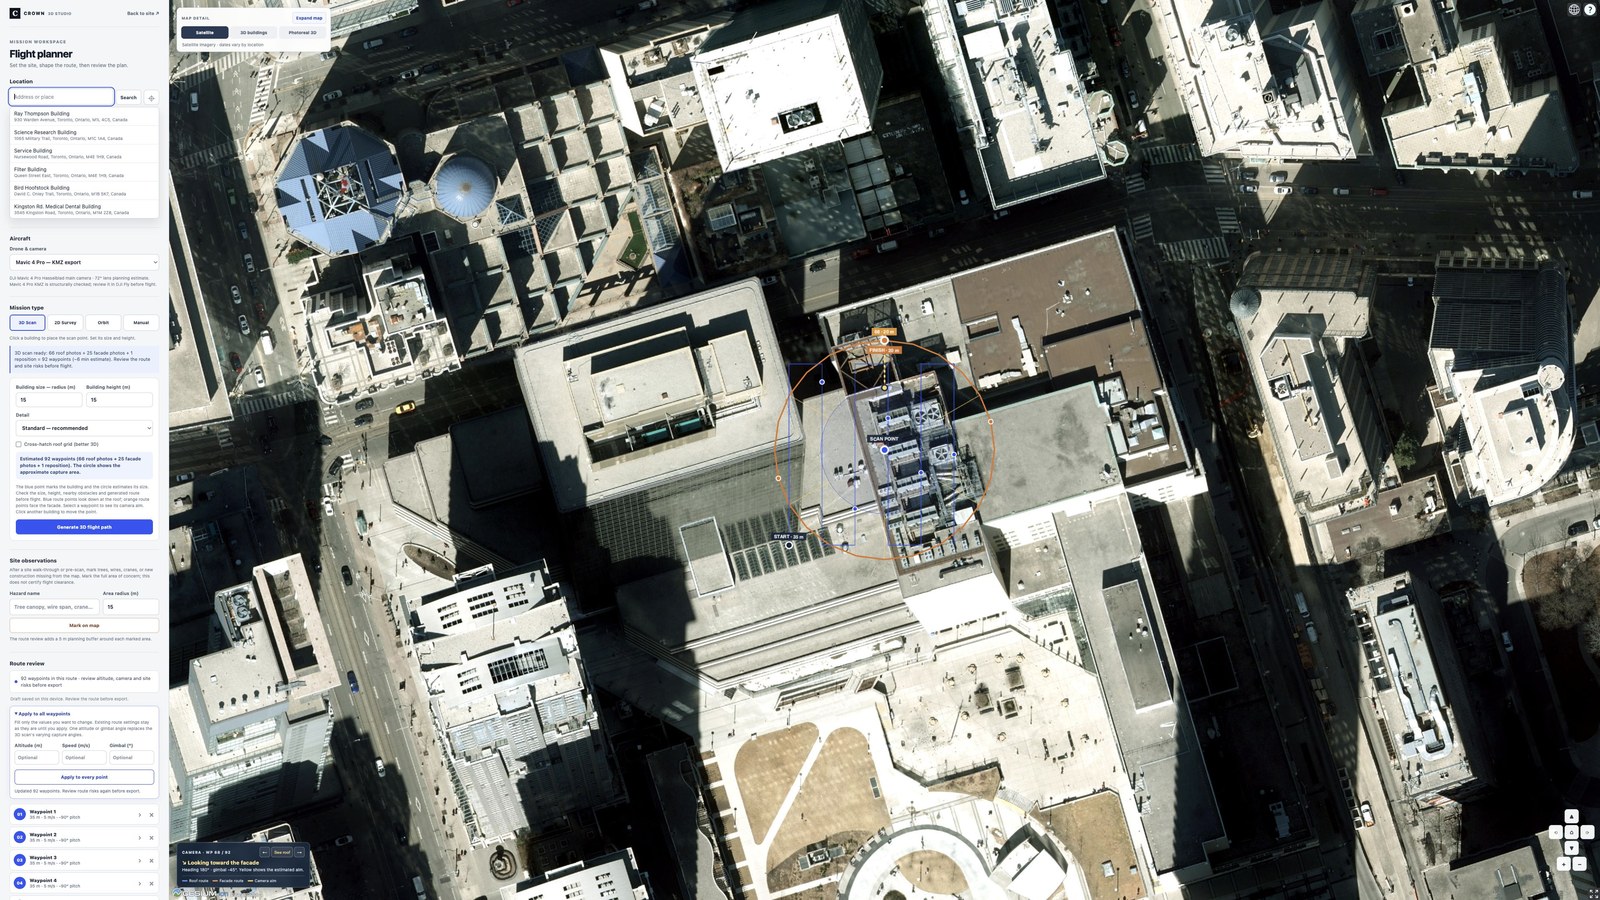
1. Start with the whole route
Look at the start, finish, connecting lines and waypoint count before editing individual points. Confirm that the route covers the intended subject and does not extend into an unintended area.
The route summary estimates points, photographs and time. It does not measure actual battery endurance or confirm that the mission is flyable. A larger point count is not, by itself, a sign of higher capture quality.
2. Inspect a waypoint and its camera
Select a waypoint in the list or on the map. Check its values alongside the camera-direction panel. Use previous and next to compare neighbouring points and the transitions between roof and facade passes.
| Setting | What to review |
|---|---|
| Altitude (m) | The height entered for that point. Confirm the reference used in your flight app and inspect height changes along the route. |
| Speed (m/s) | The planned travel speed. Check it against the views you need and the real conditions. |
| Gimbal (°) | Camera tilt. A value of −90° looks straight down; values nearer 0° look closer to horizontal. |
| Heading (°) | The planned aircraft direction. Inspect it together with gimbal pitch to understand the camera aim. |
| Take photo | Whether the point is intended to trigger a photograph. |
For a building scan, check downward roof views and inward facade views. An attractive path does not guarantee useful framing. Read the capture guide for connected roof and facade photographs.
3. Change all waypoints together
- Open “Apply to all waypoints”.
- Fill only the fields you want to change: altitude, speed or gimbal.
- Leave the other fields blank to preserve their existing values.
- Choose “Apply to every point”.
- Review the updated route and several camera views.
Enter 5 in Speed, leave Altitude and Gimbal blank, then apply. Every waypoint’s speed changes; its altitude and gimbal values stay as they were. Choose the speed for your own capture and conditions.
Entering one altitude replaces the route’s varying heights. Entering one gimbal value replaces its varying camera tilts. A 3D scan may need that variation to cover the roof and facades, so do not fill those fields unless you intend to replace it.
Manual mode’s “New-waypoint defaults” apply to points you add afterwards. Use bulk editing to change points already in the route. Regenerating a scan, survey or orbit also creates new points; check the settings again afterwards.
4. Review observations and changes
After a site walk-through or pre-scan, use “Site observations” to mark the full area of an observed tree canopy, wire span, crane or new construction. Run “Review route risks” and inspect the warnings.
Map imagery and building data can omit obstacles or be out of date. A route with no warning is not a verified clear route. Repeat the review after moving points, changing heights, regenerating the route or updating an observation.
5. Before preparing a KMZ
- The selected aircraft’s export status matches the file you intend to use.
- Start, finish, height changes and connecting route segments have been reviewed.
- Camera direction and photo actions match the capture you need.
- Bulk edits preserved the fields you intended to keep.
- The route has been checked against current site observations.
- “KMZ download name” identifies the correct site or mission version.
Use “Check & prepare KMZ” on an export-enabled profile. The planner adds the .kmz extension if needed. Preparation checks the file’s expected structure; it does not verify controller import, obstacle clearance or real flight performance.
Currently, Mavic 4 Pro has KMZ preparation. Mavic 3 series, Mini 4 Pro, Mini 5 Pro, Air 3 and Air 3S are planning previews with export disabled. Review the mission in DJI Fly and verify the real site before flight.